Epoxy resin, a two-part solution that solidifies into a glossy, glass-like finish, is used in resin art, an enthralling artistic medium. Resin can be turned into stunning artwork by combining it with color pigments, glitter, flowers, stones, or other ornamental materials.
Resin art, which is popular in both the do-it-yourself and home decor industries, enables artists to make personalized tabletops, jewelry, bookmarks, trays, coasters, and more. Its glossy texture and vibrant colors make every piece unique and luxurious-looking
Why is Resin Art So Popular
The popularity of resin art has skyrocketed in recent years. This is the reason
Easy for beginners: To begin, a fine art degree is not required.
Customizable: You can add embedded items, colors, and patterns to any resin creation.
High Potential for Profits: Resin crafts are popular on websites like instagram and Etsy.
Therapeutic: The process is calming and peaceful for many designers.
Gift-worthy: Personalized resin artwork creates unique and high-quality presents.
Essential Tools and Materials
Be sure you have the following before beginning your first resin project
Hardener with epoxy resin (Verify the brand’s mixing ratio)
Stir sticks and measuring cups
A wooden canvas board or silicone moulds
Mica powder, acrylic paint, and alcohol inks are examples of pigments and dyes.
Heat gun or butane torch (To remove bubbles)
Protective gear: gloves, mask.
Use a newspaper or plastic sheet to shield your work area.
Select a space that is dust-free and has adequate ventilation. Dust can get into sculpture while it cures, and resin can relese atrong fumes,
Step by Step How to make Resin Art
Here is a simple, step-by-step tutorial for beginners
1. Setup Your Workspace
Use plastic to cover your table. Put on a mask and gloves.
2. Meausre and Mix
As directed, mix the resin and hardener in equal amounts. For three to five minutes, stir slowly until thoroughly combined.
3. Add Pigments
After dividing the resin into smaller cups, add the colors of your choice.
4. Pour the resin
Pour the coloured resin in imaginative patterns onto your surface or into your mould.
5. Remove Bubbles
To get rid of any air bubbles, softly rub the surface with a heat gun or torch
6. Curing Time
Depending on the brand and temperature, allow the resin to cure for 24 to 72 hours. During this time, don’t move or touch it.
Easy Resin Art Projects Ideas
Are you new to resin art? Try these simple suggestions for beginners:
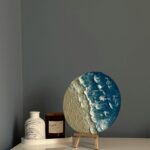
Coasters with an Ocean theme that use swirls of blue and white
Bookmarks with pressed flowers
Keychains with a galaxy effect and shimmer powder
Initials or nameplates with metallic flakes
Gold leaf and shattered glass are used to create geode wall art.
These crafts are all easy to make, adaptable, and excellent for selling or giving as gifts.
Tips for Resin Art Success
Make sure your surface is level because resin flows and self-levels.
Accurate measurement is essential since improper ratios can result in resin that sticky or uncured
Start small: Before taking on big projects, try making coasters or keychains.
Work in layers: Add several thin layers if you’re embedding things like flowers or shells.
Keep dust out by covering your project with a plastic container while it cures.
Is Resin Art Safe?
If you take the right precautions, resin art is safe. Wear a respirator mask, put on nitrile gloves, and operate in an area with adequate ventilation. Despite being classified as “non-toxic,” some resins can nonetheless irritate skin or trigger allergic reactions. Always read the safety instructions and the label.
Resin should not come into contact with food, skin, or animals
Final Thoughts
Resin art is a lovely method to express yourself and even launch a creative business, so it’s more than simply a pastime. The options are unlimited, whether you’re creating it for your house, giving it to a friend, or selling your artwork online.
You’re ready to put your creativity on display now that you understand the fundamentals. This weekend, try your first project! Don’t forget to snap photos of your shiny creation.
Loved this guide? Click here to read the 5 biggest resin art mistakes that Artists make


Leave a Reply